


Rider Stories
A collection of cyclists’ stories, each page etched with poems about the wind and freedom.
There's no item in your cart.
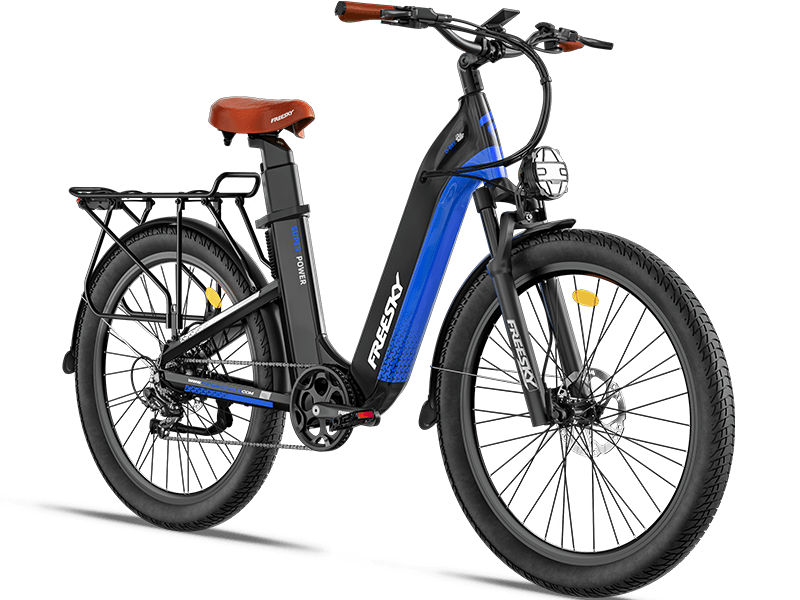
You May Also Like
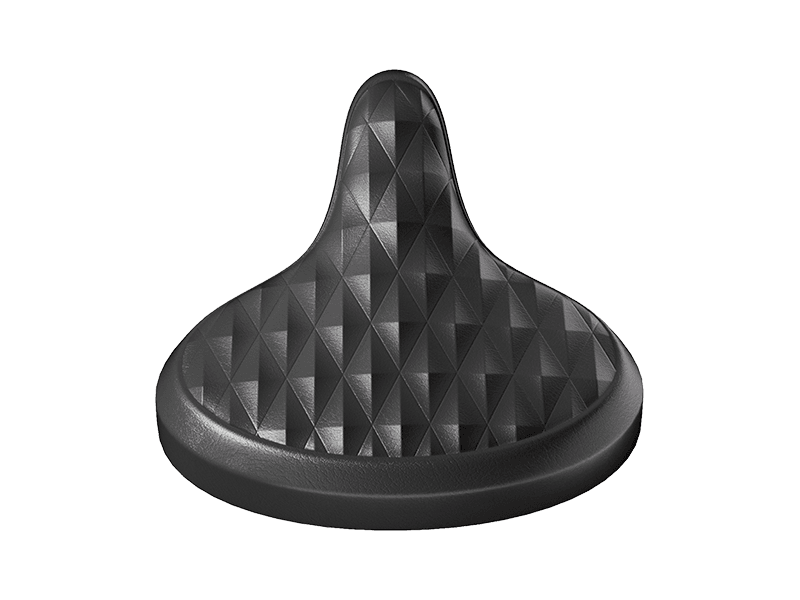
Oversized Comfortable Saddle
C$88.00

Twist Throttle with Grips (Right-Hand Only)
C$101.00 C$176.00
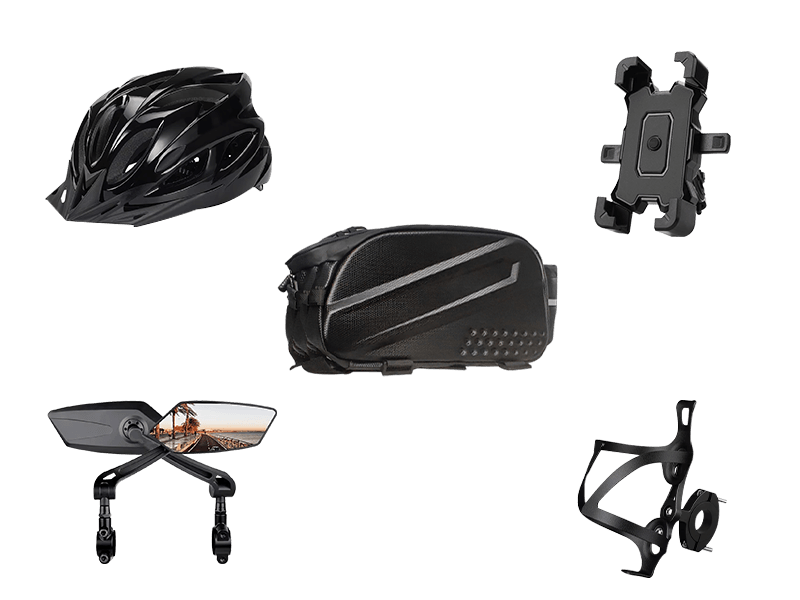
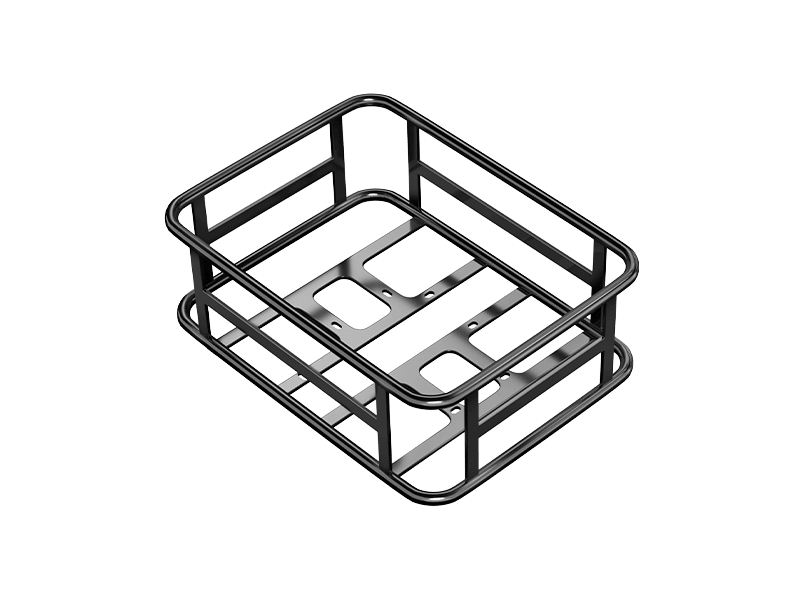
Cycling Package
C$118.00
You're Saving C$0.00
Shipping, taxes, and discount codes calculated at checkout.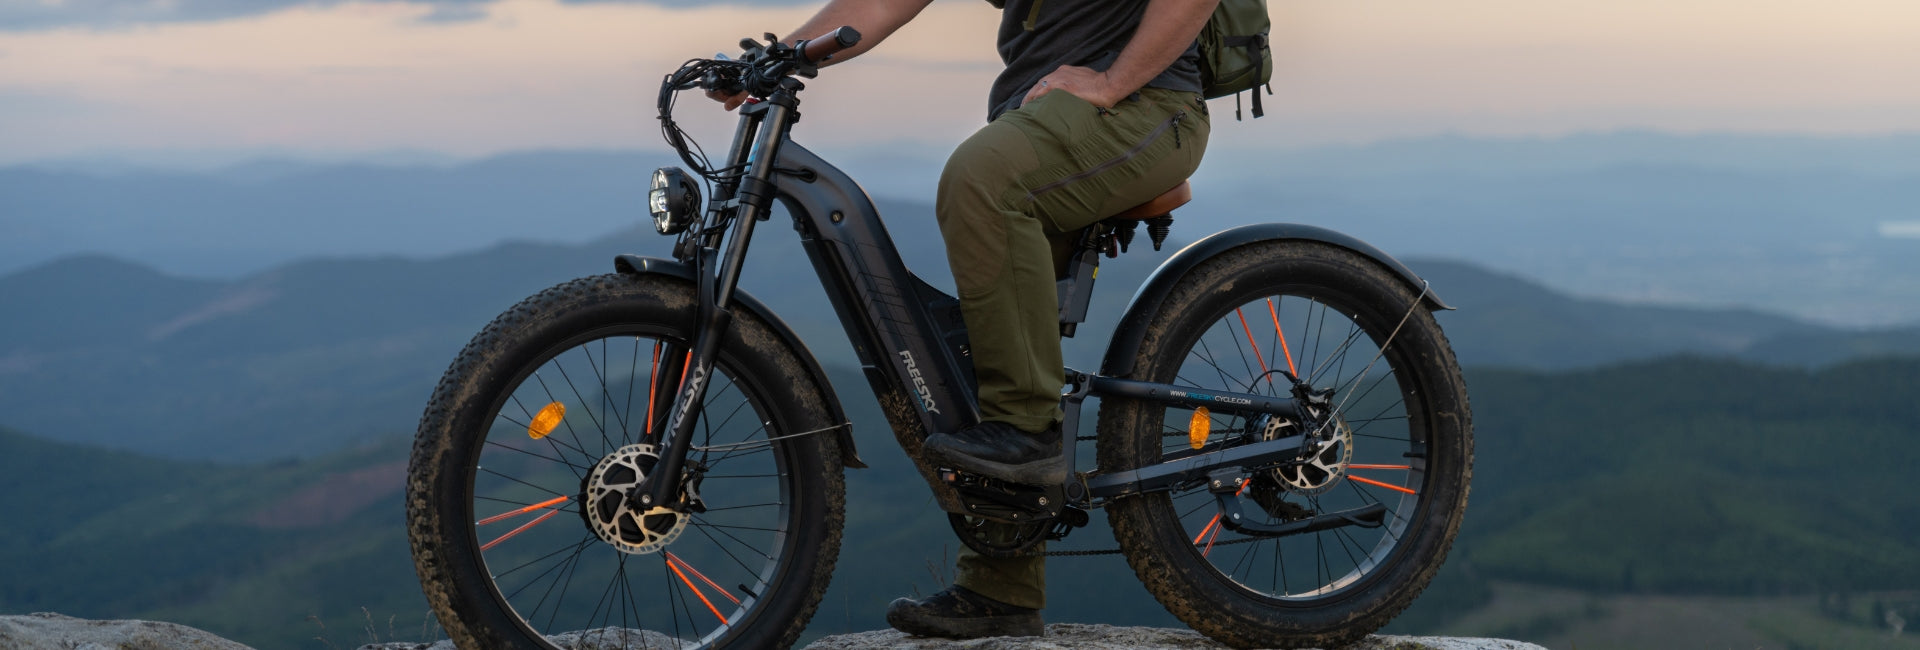
E-bike Security: 7 Essential Tips to Protect Your Investment
Jul 11, 2025
E-bikes are a fantastic way to get around—eco-friendly, efficient, and fun! However, as the popularity of e-bikes rises, so does the risk of theft. Unlike traditional bicycles, e-bikes are often more expensive and can be more enticing targets for thieves. Protecting your e-bike is crucial to ensure that it stays secure and ready for your next ride. Here are 7 essential tips to help you safeguard your e-bike and protect your investment: 1. Invest in a High-Quality Lock One of the most basic yet crucial steps to prevent theft is investing in a strong and reliable lock. Many e-bike owners make the mistake of using cheap locks, which can be easily bypassed. Opt for high-quality U-locks or chain locks made of hardened steel, as they are much harder to cut through. Tip: Look for locks that have an anti-theft rating and consider a combination of different types of locks (e.g., U-lock plus a chain lock) for added security. 2. Secure Both the Frame and the Wheels When locking up your e-bike, it’s important to secure both the frame and the wheels. Many thieves target the wheels, as they can be removed and sold separately. To protect both parts of your bike, use locks that are long enough to go through the frame, both wheels, and an immovable object. Tip: If your e-bike has quick-release wheels, consider upgrading to bolts that require special tools to remove. 3. Park in Well-Lit, High-Traffic Areas The location where you park your e-bike plays a huge role in its safety. Always choose a well-lit, high-traffic area, as these locations are less likely to attract thieves. Busy public areas with surveillance cameras (such as bike racks at shopping malls, universities, or train stations) are ideal spots. Tip: Avoid leaving your e-bike in isolated or poorly lit areas, even for a short period. 4. Use a GPS Tracker for Your E-bike One of the most effective ways to track and recover your e-bike in case it gets stolen is by installing a GPS tracker. These small, discreet devices allow you to monitor your bike’s location in real time via a smartphone app. Many GPS trackers also have an alarm feature that can notify you if your bike is moved. Tip: Look for GPS trackers designed specifically for e-bikes, as they tend to be small, durable, and can be easily hidden on your bike. 5. Remove the Battery When Leaving It Unattended E-bike batteries are expensive and can be a target for thieves. If you’re leaving your e-bike unattended for an extended period, remove the battery and take it with you. This reduces the risk of your battery being stolen, and it also prevents thieves from riding away with your bike if they have the means to bypass your lock. Tip: If removing the battery isn’t practical, consider using a lock specifically designed to secure the battery. 6. Install an E-bike Security System An increasing number of e-bike owners are opting for integrated security systems to deter theft. These systems can include alarms that activate if the bike is moved or tampered with, as well as automatic locking mechanisms that prevent the wheels from moving. Some systems even send alerts to your phone if suspicious activity is detected. Tip: Check with your e-bike’s manufacturer to see if there are compatible security systems that can be installed. 7. Mark Your E-bike with Unique Identifiers Marking your e-bike with a unique identifier, such as a serial number, can help in recovering it if it’s stolen. Many law enforcement agencies recommend engraving your bike with a number or using stickers with an identification code. This makes it easier to trace the bike if it ends up in the wrong hands. Tip: Register your e-bike with a national database, such as the Bike Index or National Bike Registry, so that authorities can easily track it. Bonus Tip: Get Insurance If you’ve invested heavily in an e-bike, consider getting insurance that covers theft. Many insurance companies offer specific policies for e-bikes that will cover the cost of replacing your bike if it’s stolen. This provides an extra layer of financial security in case the worst happens. Conclusion Protecting your e-bike from theft requires a multi-layered approach. By using high-quality locks, parking in secure areas, installing a GPS tracker, and taking proactive steps like removing the battery, you can significantly reduce the risk of theft. It’s also worth considering marking your bike with unique identifiers and investing in an e-bike-specific security system for ultimate peace of mind. By following these essential security tips, you can enjoy your e-bike with confidence, knowing that your investment is well-protected. Stay safe, and happy riding!
Read More

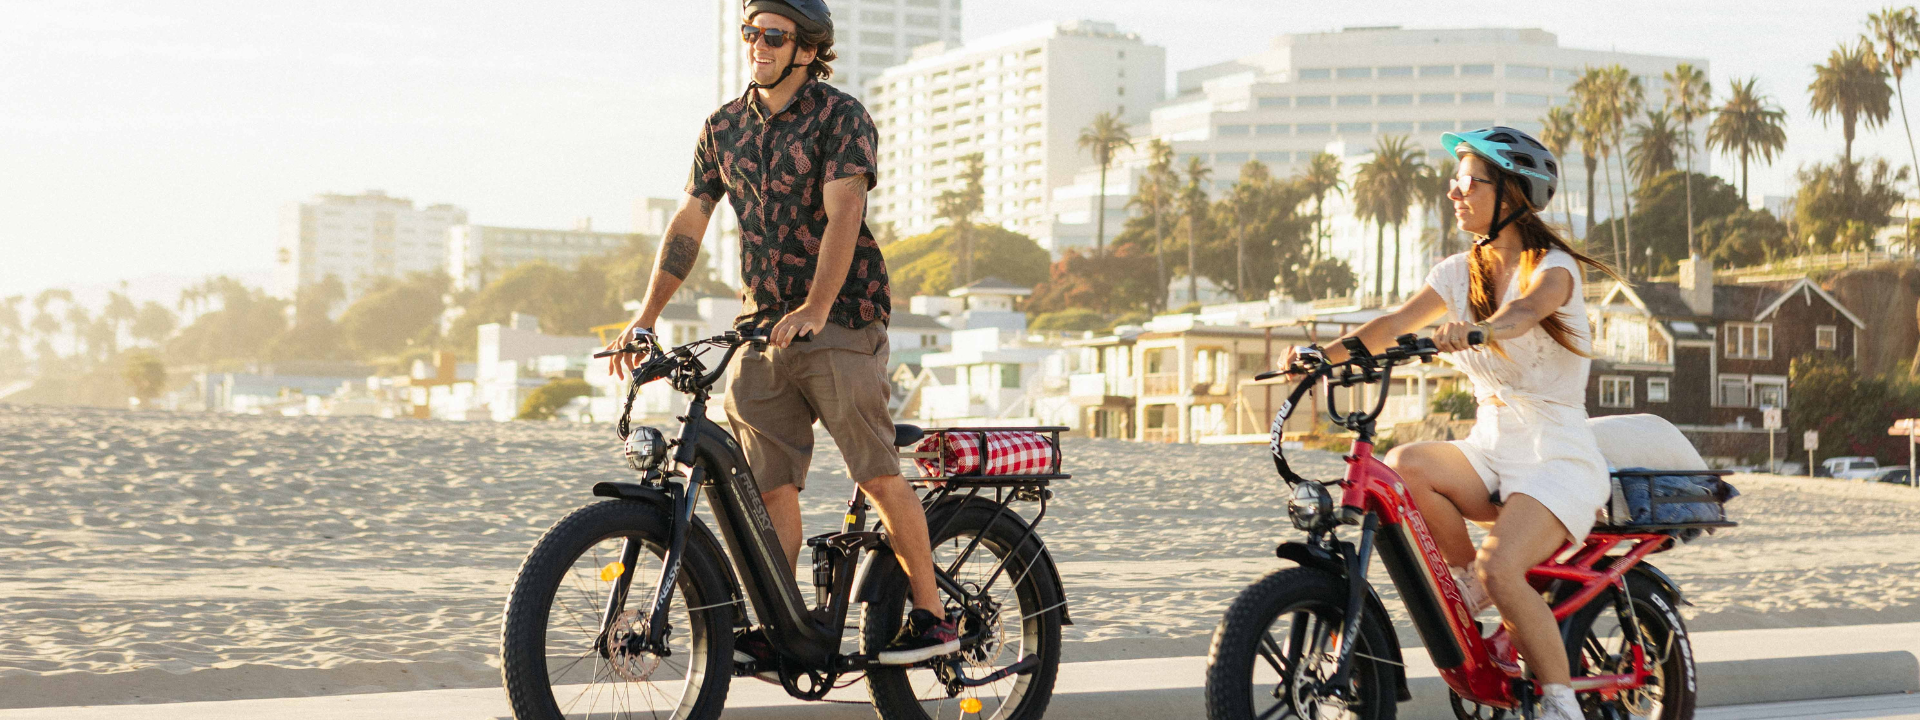
Unlocking Freedom: Why Seniors Are Embracing the Ebike Revolution
Jul 07, 2025
Gone are the days when bicycles were solely the domain of the young and sprightly. A quiet revolution is rolling through parks, neighborhoods, and bike paths, powered by a familiar yet enhanced technology: the electric bicycle, or ebike. And leading the charge? Seniors. From baby boomers to the active retired, older adults are embracing ebikes in record numbers. So, what's driving this surge in silver cycling? Here’s a look at the key reasons why ebikes are becoming the vehicle of choice for so many seniors: Reclaiming Freedom and Independence: For many seniors, declining stamina, joint pain (like arthritis), or certain health conditions can make traditional cycling daunting or impossible. An ebike changes that. The pedal-assist motor provides a gentle (or powerful!) boost, flattening hills, conquering headwinds, and extending range significantly. Suddenly, trips to the store, the library, visiting friends, or simply exploring the neighborhood become feasible and enjoyable again, without relying on a car or public transport. It’s a powerful way to regain autonomy. Gentle Exercise Made Enjoyable: Staying active is crucial for healthy aging, but high-impact activities can be tough on aging bodies. Ebikes offer a perfect solution: low-impact exercise. You still pedal, getting your heart rate up and muscles working, but the motor takes the sting out of the effort. This makes cycling accessible to those who might find regular biking too strenuous, encouraging consistent physical activity that improves cardiovascular health, strengthens muscles, and boosts mood – all without excessive strain. Going Farther, Seeing More: The electric assist isn't just about making cycling possible; it's about making it more. Seniors can comfortably tackle longer distances, explore scenic trails they might have avoided before, keep up with younger cycling companions, or simply enjoy longer, more leisurely rides without worrying about exhaustion on the way back. It opens up a whole new world of exploration and adventure. No Sweat, More Fun (Commuting & Errands): Need to pop to the shops or meet a friend for coffee? An ebike is often faster than walking and avoids the hassle of parking a car. Crucially, the motor assistance means arriving at your destination feeling fresh, not sweaty and tired. This practicality makes ebikes a genuine alternative for local transportation. Social Connection and Community: Ebike groups specifically for seniors are popping up everywhere! Cycling is inherently social, and ebikes level the playing field, allowing friends of varying fitness levels to ride together comfortably. Group rides offer camaraderie, shared experiences, and a wonderful way to combat social isolation, fostering a sense of community and belonging. Overcoming Physical Limitations Gracefully: Features common on modern ebikes are particularly senior-friendly: Step-Through Frames: Easy mounting and dismounting without swinging a leg high. Comfortable Geometry: Upright riding positions reduce strain on the back, neck, and wrists. Stability: Many models offer wider tires or specific designs for enhanced balance. Lower Maintenance: Often simpler than cars and less physically demanding to manage than traditional bikes (especially with hub gears). Cost-Effective Transportation: Compared to the ongoing costs of fuel, insurance, maintenance, and parking for a car, an ebike is incredibly economical to run (just a few cents to charge!). For many seniors on fixed incomes, this is a significant factor. Pure Enjoyment and the Joy of Riding: Let's not forget the simplest reason: it's fun! The feeling of effortless glide, the wind in your hair, the sights and sounds experienced at a perfect pace – ebikes bring back the sheer joy of cycling that many seniors may have thought was behind them. It feels like flying. Addressing Concerns: Safety is paramount. Seniors (and all riders!) should: Always wear a helmet. Choose a bike that fits well and feels stable. Start slowly in safe environments to get used to the motor assist and handling. Consider safety courses (many are available for ebike riders). Use lights and wear visible clothing. Understand local ebike laws (speed limits, where you can ride). The Bottom Line: Ebikes aren't just a trend; they're a transformative tool for healthy, active, and independent aging. By removing the barriers of physical limitations and fatigue, they empower seniors to explore, exercise, socialize, and run errands with newfound freedom and a whole lot of smiles. It's about staying engaged with the world, improving well-being, and rediscovering the simple pleasure of a ride. So, the next time you see a group of seniors cruising effortlessly by on their ebikes, know that you're witnessing more than just a ride – you're seeing freedom, joy, and a vibrant approach to later life in action. It’s no wonder more seniors are choosing to plug into the ebike revolution!
Read More
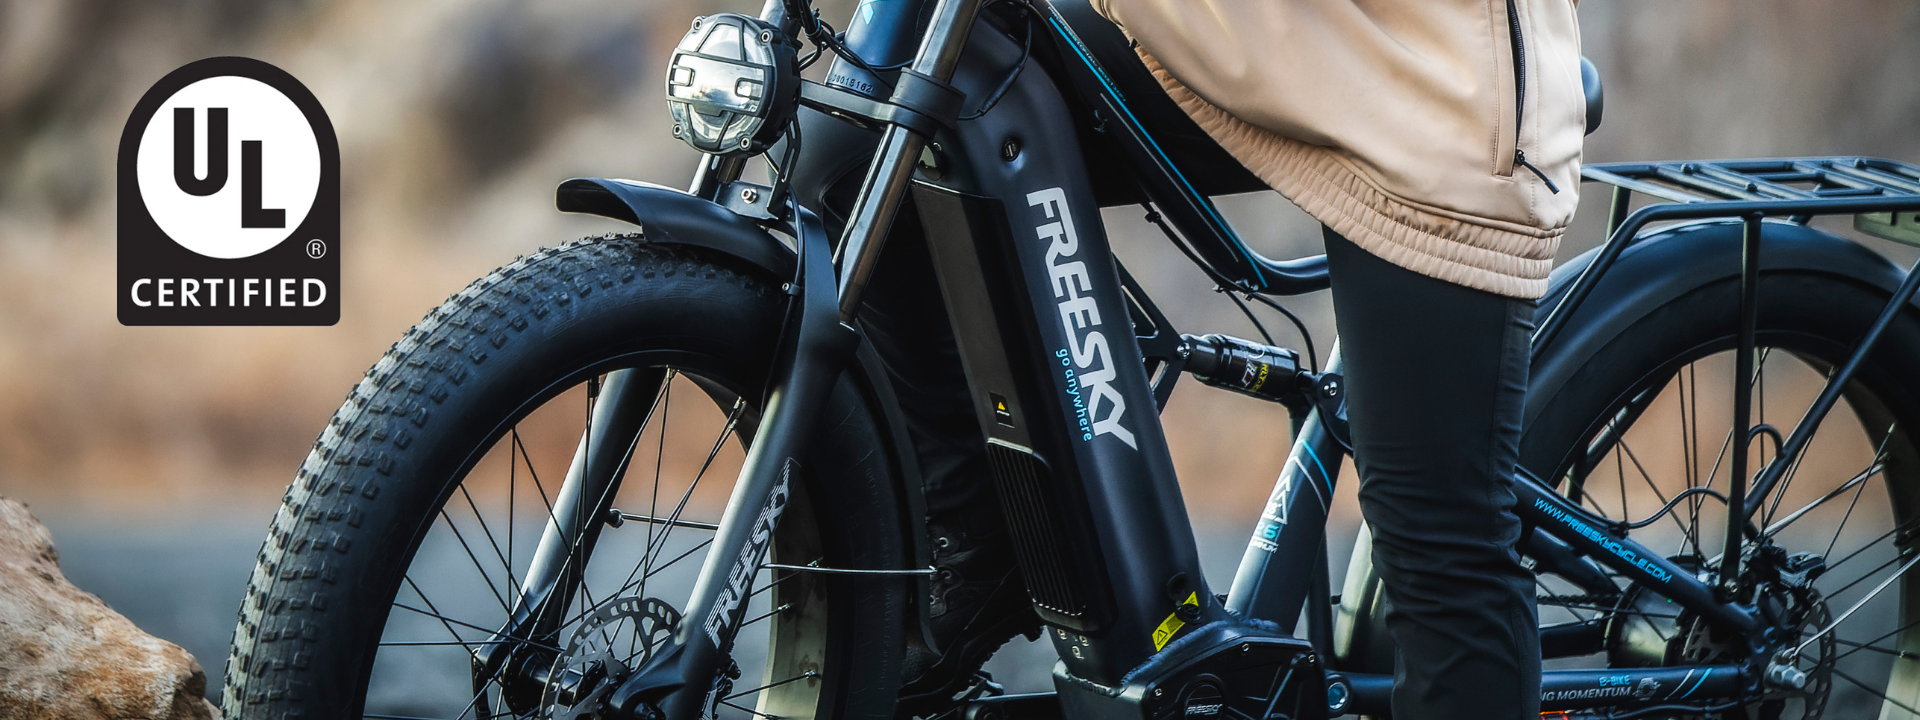
Why UL2271 Certification is the Gold Standard for Your E-Bike Battery
Jul 04, 2025
The electric bike revolution is surging, offering a greener, more enjoyable way to commute and explore. But as e-bikes become ubiquitous, a critical concern has ignited alongside them: battery safety. Headlines about e-bike battery fires, often devastating and sometimes tragic, have understandably rattled consumer confidence. In this landscape, one certification stands out as the beacon of safety and reliability: UL 2271. Beyond the Headlines: The Real Risk Lithium-ion batteries pack immense energy into a small space. While generally safe when well-designed, manufactured correctly, and used properly, failures can occur. These failures, often stemming from substandard cells, poor construction, inadequate protection circuits, or physical damage, can lead to "thermal runaway" – an uncontrollable chain reaction generating extreme heat, toxic fumes, and fire. The consequences in a home, office, or apartment building can be catastrophic. Enter UL 2271: The Rigorous Guardian UL 2271, developed by the globally recognized safety science leader UL Solutions (formerly Underwriters Laboratories), is specifically designed to address the unique hazards of lithium-ion battery packs used in Light Electric Vehicles (LEVs), including e-bikes, e-scooters, and hoverboards. It's not a simple checkbox; it's an exhaustive series of tests simulating real-world abuse and potential failure scenarios far beyond basic electrical safety. What Does UL 2271 Actually Test? The certification demands batteries pass a gauntlet of over 20 stringent tests, including: Electrical Abuse: Overcharging, forced discharge, short-circuiting. Mechanical Abuse: Crushing, impact, vibration, drop testing. Environmental Stress: Exposure to extreme temperatures (hot and cold), thermal cycling, humidity. Fire Exposure: Direct flame impingement. Internal Component Failure: Simulating failures within the battery management system (BMS) or individual cells. The goal? To ensure the battery pack: Does not explode or catch fire during or after testing. Prevents thermal runaway from propagating between cells. Contains any fire within the battery enclosure if ignition occurs. Minimizes the release of hazardous projectiles or flames. The "Gold" in the Gold Standard: The Value of UL2271 So, why is UL2271 certification so highly prized? Unmatched Safety Assurance: It provides the most comprehensive, independently verified proof that a battery pack has been engineered and built to withstand extreme conditions and minimize fire risk. It directly addresses the core failure modes seen in real-world incidents. Consumer Trust & Confidence: Seeing the UL 2271 mark allows consumers to purchase and charge their e-bikes with significantly greater peace of mind. It signals a manufacturer's serious commitment to safety over cutting corners. Reduced Risk & Liability: For manufacturers, retailers, and property managers (like landlords or building associations), specifying or requiring UL 2271 batteries drastically lowers the risk of catastrophic failures and associated legal liabilities. Regulatory & Insurance Influence: Governments and insurers are taking notice. Cities like New York are actively promoting or even mandating certified batteries. Insurance companies are more likely to offer favorable terms for devices using UL 2271 certified packs. Market Differentiation: In a crowded market, UL 2271 certification is a powerful differentiator. It elevates a brand above those relying on cheaper, uncertified, or less rigorous standards. It signifies quality and responsibility. Global Recognition: UL is a globally trusted name. UL 2271 certification is recognized and respected internationally as the benchmark for LEV battery safety. Beyond "CE" or Cheap Imitations Don't be fooled by vague claims of "certification" or markings like "CE" (which primarily indicates conformity with EU electrical safety standards, not specific rigorous battery abuse testing). Cheap batteries often carry counterfeit marks or only meet minimal requirements. UL 2271 is specific, demanding, and independently verified. Look for the official UL Mark listing the certification number. The Bottom Line: Non-Negotiable Safety As e-bikes integrate deeper into our lives and urban infrastructure, battery safety cannot be an afterthought. UL 2271 certification is not just a "nice-to-have"; it's rapidly becoming the essential foundation for responsible e-bike ownership, manufacturing, and regulation. When buying an e-bike or replacement battery, demand UL 2271 certification. It's the most significant investment you can make in the safety of yourself, your home, and your community. It’s the gold standard for a reason – it signifies a battery built to power your ride, not a potential disaster. Choose wisely, choose certified, choose UL 2271. Look for the Mark. Ride with Confidence.
Read More

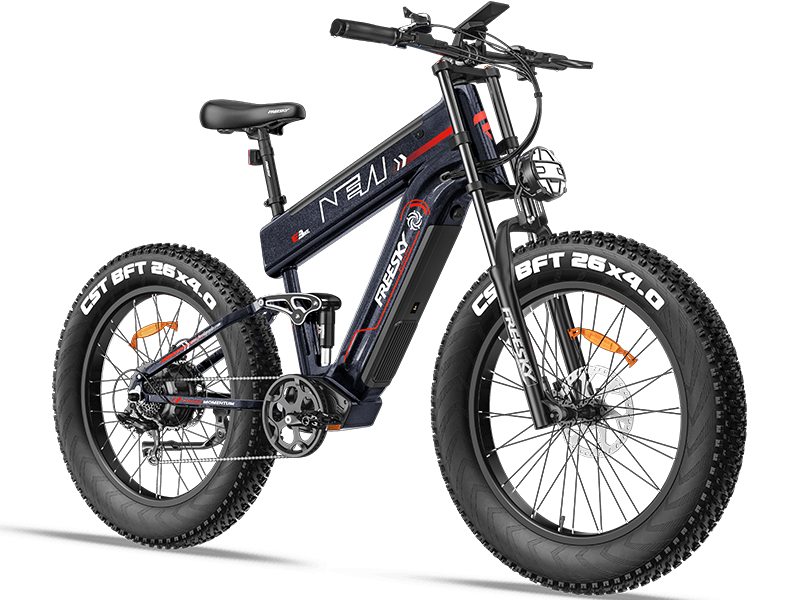
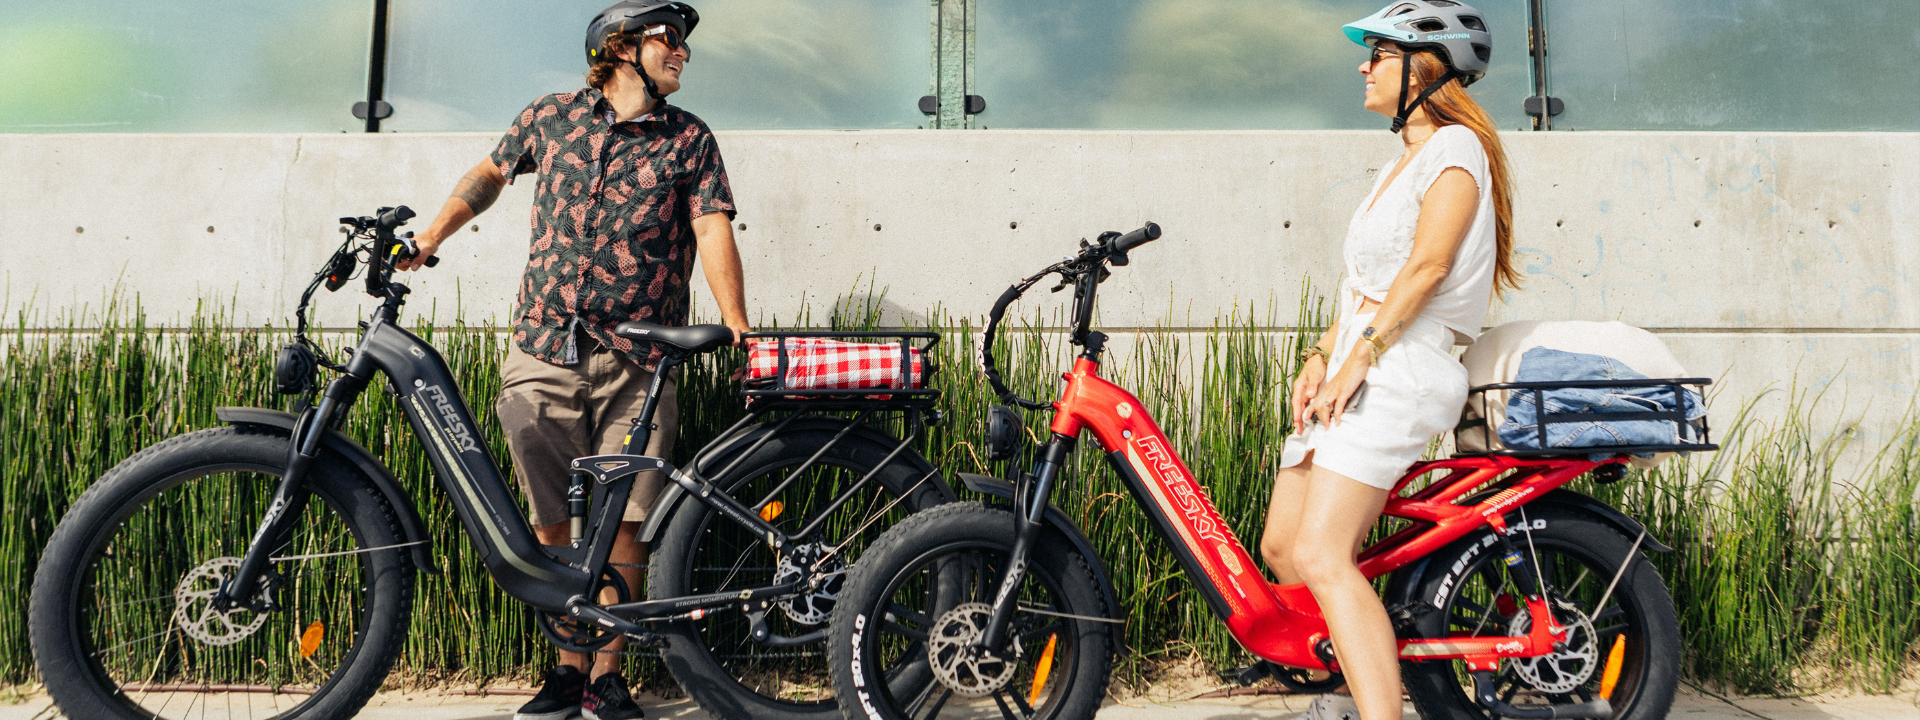
Unlock Boundless Freedom: Introducing the FREESKY NOVA Dual-Battery E-Bike
Jun 19, 2025
The Future of E-Biking is Here At FREESKY, we believe the perfect e-bike shouldn’t force you to choose between adventure and practicality. It should empower both. That’s why we’re electrified to unveil our latest innovation: NOVA. Engineered for riders who refuse limits, this game-changing e-bike redefines freedom on two wheels. Why NOVA Changes Everything 🚀 1. Unmatched Range & PowerTired of planning routes around charging stops? NOVA’s revolutionary dual Samsung 15Ah batteries deliver a staggering 75–120 miles per charge—enough to commute all week or conquer weekend explorations without anxiety. Paired with a robust BAFANG 500W motor and a 28 MPH top speed, hills flatten and distances shrink. 🌈 2. Effortless Comfort, Intelligent RideNOVA doesn’t just move you—it understands you: Torque-Sensor Intelligence: Feel power flow seamlessly as the motor responds to your pedaling. No jerks, no delays—just pure harmony. Cloud-Like Comfort: A plush shock-absorbing saddle and adjustable handlebars make every journey feel custom-tailored. Unshakeable Confidence: Glide over potholes and gravel with 27.5" x 2.25" puncture-resistant tires. City streets or country trails? NOVA adapts. ❤️ 3. Designed for Real Life (and Real People)We crafted NOVA to fit your world: Low-Step Frame: Elegant mounting for commuters in suits, skirts, or anyone valuing accessibility. Cargo-Ready Versatility: Attach bags, baskets, or child seats to the adjustable rear rack—transform NOVA into a grocery hauler, school-run hero, or adventure partner. Inclusive by Design: Thoughtful details welcome riders of all mobility levels. “NOVA isn’t just an e-bike—it’s your passport to unexplored streets, uninterrupted commutes, and unforgettable moments.” Who Is NOVA For? Urban Explorers: Cut traffic, park anywhere, and arrive energized. Weekend Adventurers: Discover trails beyond the city without range fears. Practical Commuters: Carry gear, skip gas stations, and ride in any outfit. Accessibility-Focused Riders: Redefine independence with stress-free mounting. The Journey Begins Soon… We’ve poured relentless innovation into NOVA—and we can’t wait for you to experience it. This isn’t just another e-bike; it’s a revolution in freedom, comfort, and possibility.
Read More

The Wait is Over: Meet NOVA – Freesky’s Game-Changing Dual-Battery E-Bike
Jun 06, 2025
Hey Freesky Family & Future Riders! We’ve been brewing something extraordinary behind the scenes, and today we’re thrilled to pull back the curtain. Get ready to redefine your ride – Freesky NOVA is coming to electrify your journey! 🔋 Double the Power, Double the Freedom Say goodbye to range anxiety! NOVA shatters limits with its revolutionary Samsung Dual-Battery System (15Ah + 15Ah). Imagine cruising 75-120 miles on a single charge – commute all week, explore all weekend. This isn’t just an upgrade; it’s liberation. ⚡ Performance That Thrills Powered by the legendary BAFANG 500W motor, NOVA delivers heart-pumping acceleration and a top speed of 28 MPH. Conquer urban slopes or country trails effortlessly, backed by torque-sensor technology that reads your every pedal stroke for buttery-smooth power. 🌟 Comfort Meets Intelligence We believe joy lies in the journey: Sink into serenity with our shock-absorbing wide saddle. Customize your stance with the adjustable handlebar – ride tall, ride relaxed. Glide over bumps on 27.5" x 2.25" puncture-resistant tires – your shield against city potholes and gravel backroads. 🌍 Designed For Every Rider, Every Mission NOVA isn’t just built; it’s thoughtfully crafted:✨ Low-step frame: Gracefully mount and dismount – perfect for commuters in suits, skirts, or anyone seeking ease.✨ Inclusive by design: A gentle nod to riders who value accessibility without compromising style.✨ Cargo-ready freedom: Attach panniers, baskets, or child seats to the adjustable rear rack – transform NOVA into your grocery getter, adventure hauler, or school run superstar. ❤️ Why You’ll Fall in Love “It’s the e-bike that adapts to you: long-range endurance for the explorer, agile power for the urban warrior, and comfort for the everyday hero.” The Future is Charging… NOVA isn’t just another e-bike. It’s your key to uncharted routes, unstoppable commutes, and unforgettable moments. 🔥 Stay Tuned – The Revolution Launches Soon!👉 Be the first to know:Subscribe to our newsletter for exclusive launch updates & early-bird offers. Your journey to freedom starts with a single pedal stroke. Ready to ride beyond?
Read More
Powering Your Ride: The Crucial Link Between Your E-bike Battery and Riding Range
Jun 05, 2025
For anyone considering or already enjoying the freedom of electric biking, one question reigns supreme: "How far can I go on a single charge?" The answer lies at the heart of your e-bike – the battery. Understanding the intricate relationship between your battery and your potential riding range is key to unlocking confident, frustration-free adventures. The Battery: Your E-bike's Fuel Tank (and Engine's Power Source) Think of your e-bike battery as both the fuel tank and the power station. It stores electrical energy and delivers it to the motor, which provides the pedal-assist (or throttle power) that defines the e-bike experience. Naturally, the characteristics of this battery are the primary determinant of how far that energy can take you. Key Battery Factors Dictating Range: Capacity (Watt-hours - Wh): The Core Metric What it is: This is the single most important number for estimating potential range. Watt-hours (Wh) represent the total energy stored in the battery. It's calculated by multiplying the battery's Voltage (V) by its Amp-hour rating (Ah): Wh = V x Ah. Why it matters: A higher Wh rating means more energy on board. A 500Wh battery holds significantly more energy than a 300Wh battery, all else being equal, translating directly to a longer potential range. Comparing Wh ratings is the most direct way to compare battery capacity across different e-bikes. Voltage (V) and Amp-hours (Ah): The Components of Wh Voltage (V): Represents the electrical "pressure" of the system. Common e-bike batteries are 36V, 48V, or 52V. Higher voltage systems can often deliver power more efficiently, especially under heavy load (like climbing hills), which can indirectly contribute to better range utilization. Amp-hours (Ah): Represents the battery's "current capacity" – how much current it can deliver over time. A higher Ah rating generally means longer runtime for a given voltage. However, always look at the combined Wh (V x Ah) for the true energy capacity picture. A 48V 10Ah battery (480Wh) holds more energy than a 36V 12Ah battery (432Wh). Battery Health & Age: The Degradation Factor Lithium-ion batteries (the standard for e-bikes) degrade over time and with use. Their ability to hold a full charge diminishes. Impact on Range: A battery that's 2-3 years old or has undergone hundreds of charge cycles will likely only hold 80% (or less) of its original capacity. This directly reduces your achievable range. Proper charging habits (avoiding full discharges, not leaving at 100% charge for weeks) can help maximize lifespan. Beyond the Battery: The Range Equation Has Variables While the battery sets the potential energy limit, your actual range is significantly influenced by how you and your environment use that energy: Rider Input & Assist Level: Assist Level: This is HUGE. Using maximum power (Turbo or Sport mode) consumes energy dramatically faster than Eco or Low mode. Relying more on your own pedaling effort drastically extends range. Pedal Power: The whole point of pedal-assist! The harder you pedal, the less work the motor has to do, conserving battery. Terrain & Topography: Hills: Climbing is energy-intensive. Frequent or steep hills will significantly reduce your range compared to flat terrain. Descents, however, can sometimes allow for regeneration (if equipped) or coasting without motor drain. Rider & Cargo Weight: Heavier loads (the rider plus any cargo or passengers) require more energy to accelerate and climb. Lighter loads generally mean longer range. Tire Pressure & Rolling Resistance: Under-inflated tires create more drag, forcing the motor to work harder. Keeping tires properly inflated is a simple way to maximize efficiency and range. Wind Resistance: Riding into a strong headwind significantly increases the effort required (both yours and the motor's), draining the battery faster. Tailwinds help! Temperature: Lithium batteries perform best in moderate temperatures (around 20°C / 68°F). Cold weather (below 10°C / 50°F) reduces battery efficiency and can temporarily decrease available capacity by 10-20% or more. Very hot weather can also stress the battery long-term. Tire Type & Terrain Surface: Knobby mountain bike tires on pavement create more rolling resistance than slick commuter tires. Riding on soft surfaces (sand, mud) also consumes more power. Estimating Range: A Guessing Game (with Clues) Manufacturers often provide range estimates (e.g., 50-120 km). This wide variation exists precisely because of all the variables listed above. The higher figure is usually achieved under near-perfect conditions (Eco mode, flat terrain, light rider, warm temps). The lower figure reflects more demanding use (higher assist, hills, cold). Tools like Bosch's Range Calculator are excellent for illustrating how drastically factors like assist level and weight impact range from a given battery. Maximizing Your Range: Practical Tips Choose Wisely: When buying, consider your typical rides. If you have long commutes or hilly terrain, prioritize a higher Wh battery (e.g., 500Wh+). Embrace Eco Mode: Use the lowest assist level that makes your ride enjoyable and efficient. Pedal Power: Contribute meaningfully! Think of the motor as an amplifier of your effort. Pump Up Tires: Check pressure regularly according to the tire sidewall. Plan Routes: Minimize steep climbs if range is critical. Utilize bike paths away from stop-and-go traffic. Dress Aerodynamically: Reduce wind resistance. Manage Temperature: Store and charge your battery indoors in moderate temps. If riding in cold weather, keep the battery insulated (e.g., remove it and bring it inside until you start riding) and understand range will be reduced. Maintain Battery Health: Follow manufacturer charging guidelines (avoid deep discharges, don't leave at 100% for long periods). The Takeaway: Know Your Battery, Know Your Ride Your e-bike battery's capacity (Wh) is the fundamental factor determining your potential range. However, your actual mileage is a dynamic result of how you interact with the bike and the environment. By understanding the relationship between the battery's specs and the factors that drain it, you can make informed choices when purchasing, plan your rides effectively, and adopt riding habits that stretch every electron as far as possible. This knowledge truly empowers you to explore further and enjoy the full potential of your electric freedom!
Read More

Fat Tire E-Bikes: Your Buyer's Guide to Choosing the Perfect Beast
May 29, 2025
Fat tire e-bikes aren't just a trend; they're a revolution in electric cycling, opening up terrains and experiences traditional bikes can't touch. With their oversized tires (typically 3.8" to 5" wide), electric assist, and rugged stance, they promise adventure, stability, and pure fun. But with so many options, choosing the right one can feel overwhelming. Fear not! This guide breaks down everything you need to know. What Exactly is a Fat Tire E-Bike? Imagine a mountain bike on steroids. Fat tire e-bikes combine: Ultra-Wide Tires: Providing massive surface area for incredible traction, flotation over soft surfaces (sand, snow, mud), and a surprisingly smooth ride over bumps. Electric Motor: Offering pedal assistance (pedelec) and often a throttle, making conquering hills, headwinds, and long distances effortless. Robust Frame: Built to handle the stresses of wider tires and off-road adventures. Why Choose a Fat Tire E-Bike? The Key Benefits Conquer Any Terrain: Sand, snow, mud, gravel, rocky trails, grassy fields – fat tires excel where others sink or slip. They're the ultimate all-season, all-surface machines. Superior Stability & Confidence: The wide footprint lowers your center of gravity and provides unmatched balance, especially at lower speeds or on unpredictable surfaces. Great for beginners or those with mobility concerns. Plush, Comfortable Ride: The large volume tires act like natural suspension, absorbing bumps, potholes, and vibrations significantly better than standard tires. Your back and wrists will thank you. Effortless Power: Tackle steep hills, headwinds, or long commutes without breaking a sweat. The motor makes challenging rides enjoyable and accessible. Year-Round Adventure: Truly a four-season vehicle. Snow and beach rides become not just possible, but thrilling. Pure Fun Factor: There's an undeniable "cool" factor and a unique, fun riding experience that puts a smile on your face. Choosing Your Perfect Fat Tire E-Bike: Key Considerations Primary Use (Your Mission): Recreation & Beach Cruising: Prioritize comfort, a relaxed riding position (cruiser style), and maybe a throttle for pure fun. Mid-drive or hub motors both work. Commuting: Look for practical features: fenders, racks, integrated lights, a comfortable saddle, and good range. Consider tire tread suitable for pavement/light gravel. Trail Riding & Off-Road: Focus on suspension (front fork or full suspension), powerful motor (often mid-drive for better torque and handling), hydraulic disc brakes, aggressive tread, and a sturdy frame. Snow & Sand: Ensure minimum 4.0" tires, deep aggressive tread, and sufficient motor torque/power. Hub motors can sometimes handle deep snow better than mid-drives (less susceptible to clogging). Hunting/Cargo: Look for high payload capacity, very powerful motors (often 750W+), potential for cargo racks/trailers, and stealthy color options (for hunting). Motor Type & Power: Hub Motor (Rear or Front): Simpler, often more affordable. Provides direct power but can affect handling (especially front hub). Generally good for cruising, commuting, and moderate terrain. Power typically ranges from 500W to 1000W+. Mid-Drive Motor: Mounted at the cranks/bottom bracket. Leverages the bike's gears, providing superior torque for climbing hills and technical terrain, more natural riding feel, and better overall weight distribution/balance. Preferred for serious off-road and mountain biking. Power ranges similar to hub motors. Power (Watts): Higher wattage (e.g., 750W, 1000W) means more torque for hills, acceleration, and handling heavy loads/snow. Check local regulations as many regions limit motor power (e.g., 750W max in US Class 2/3, 250W in EU). Battery (Range & Voltage): Capacity (Ah & Wh): Watt-hours (Wh) = Voltage (V) x Amp-hours (Ah). Higher Wh = Longer Range. Don't just look at Ah; voltage matters! (e.g., 48V 15Ah = 720Wh; 52V 14Ah = 728Wh). Range estimates are highly variable (terrain, assist level, weight, wind); expect 20-60+ miles realistically. Removable: Essential for easy charging, especially if storing the bike is awkward. Location: Down tube is common and provides good weight distribution. Tire Size & Tread: Width: 4.0" is standard. 4.8" or 5" offers maximum flotation for deep sand/snow but adds weight and rolling resistance on pavement. Tread: Aggressive, widely spaced knobs for loose terrain/snow. Smoother center tread with side knobs for mixed pavement/off-road. Consider studdable tires for icy conditions. Brakes: Hydraulic Disc Brakes: Highly Recommended. Essential for stopping power, especially given the bike's weight and potential for high speeds. Offer superior modulation and require less maintenance than mechanical discs. Don't compromise here. Suspension: Rigid: Simplest, lightest, cheapest. Relies entirely on tires for cushioning. Fine for smooth trails, pavement, and sand. Front Suspension Fork: Crucial for handling rough trails, rocks, and roots at speed. Improves comfort and control significantly off-road. Full Suspension: Offers maximum comfort and control on very rough terrain, but adds significant weight, cost, and complexity. Less common on fat e-bikes. Frame Material: Aluminum Alloy: Most common. Offers a good balance of strength, weight, and affordability. Steel: Durable and absorbs vibration well, but heavier. Carbon Fiber: Lightest and stiffest, but very expensive and less common on fat e-bikes. Gearing: Derailleur Gears: Offer a wide range, efficient. Require more maintenance, especially in muddy/wet conditions. Internal Gear Hub (IGH): Enclosed gears are protected from elements, very low maintenance. Smoother shifting when stopped. Often fewer gears, slightly less efficient, heavier, and more expensive. Weight & Payload Capacity: Fat tire e-bikes are HEAVY (60-80+ lbs). Ensure you can lift/maneuver it if needed (stairs, car racks). Check the manufacturer's payload capacity (rider + cargo). Many are rated for 300-350 lbs, but some heavy-duty models go higher. Price: Expect a significant investment. Quality fat tire e-bikes typically start around $1,500-$2,000 and can easily reach $4,000-$7,000+ for high-end models with premium components (mid-drive, large battery, suspension). Popular Fat Tire E-Bike Types & Examples (Illustrative - Research Current Models!) Affordable All-Rounder: Rad Power Bikes RadRover 6 Plus, Lectric XPedition Premium Trail/Off-Road: Specialized Turbo Levo SL, Trek Rail, Riese & Müller Delite GT rohloff Snow/Sand Specialist: QuietKat Ranger, Rambo Megatron Comfort Cruiser: Electric Bike Company Model Y, Juiced RipCurrent S Cargo/Hunting: Bakcou Mule, Biktrix Juggernaut Ultra FS Final Tips Before You Buy: Test Ride (If Possible): Nothing beats feeling the bike's weight, balance, and power firsthand. Check Local Laws: Understand e-bike classifications (Class 1, 2, 3) and where they are allowed (trails, roads, paths). Research Brands & Reviews: Look for established brands with good customer service and warranty support. Read independent reviews and owner forums. Consider After-Sales Support: How easy is it to get parts or service locally? Don't Forget Accessories: Budget for essentials like a helmet, lock, pump, and potentially fenders, racks, or lights if not included. Conclusion: A fat tire e-bike is your ticket to exploring beyond the pavement. By carefully considering how you'll use it and prioritizing the features that matter most (motor, battery, brakes, tires), you can find the perfect electric beast to match your adventurous spirit. Embrace the traction, soak up the comfort, and enjoy the ride – the world just got a whole lot more accessible! Ready to unleash your off-road electric adventure? Happy riding!
Read More

Speed vs. Torque Sensors in E-Bikes: Which One Powers Your Ride?
May 22, 2025
Electric bicycles (e-bikes) have revolutionized urban commuting and outdoor adventures, offering pedal-assisted power that makes cycling more accessible and enjoyable. At the heart of this technology lie two critical components: speed sensors and torque sensors. While both enhance your riding experience, they operate in fundamentally different ways. Let’s dive into how these sensors work and what they mean for your ride. Speed Sensors: The Basics Speed sensors are the simpler and more common of the two. Typically mounted on the wheel hub or pedal crank, they detect rotational movement to determine how fast you’re pedaling or moving. Here’s how they work: Mechanism: A magnet attached to the wheel or crank passes by the sensor with each rotation, sending a signal to the motor controller. Power Delivery: The motor provides assistance based on your pedaling cadence or wheel speed. For example, if you pedal faster, the motor increases power proportionally (up to a preset limit). User Experience: Riders get consistent, predictable assistance, especially at higher speeds. However, the support may feel less "natural" because it doesn’t account for how hard you’re pedaling—just how fast. Pros: Lower cost and easier to maintain. Ideal for casual riders or flat terrains where steady assistance suffices. Cons: Less responsive to varying effort (e.g., climbing hills). Can feel abrupt when assistance kicks in or cuts off. Torque Sensors: The Next Level of Precision Torque sensors elevate the e-bike experience by measuring the actual force you apply to the pedals. Found in mid-to-high-end e-bikes, these sensors create a seamless synergy between human effort and motor power. Key features include: Mechanism: Strain gauges embedded in the crank or bottom bracket detect minute deformations caused by pedaling force, translating it into an electrical signal. Power Delivery: The motor adjusts its output in real time based on your pedaling effort. Push harder (e.g., uphill), and the motor amplifies your input instantly. User Experience: The ride feels intuitive, almost like an extension of your own strength. It mimics the feel of a traditional bike but with a "superhero" boost. Pros: Natural, dynamic assistance tailored to terrain and effort. Better battery efficiency, as power scales with need. Preferred by performance-oriented riders and commuters tackling hills. Cons: Higher cost due to complex engineering. Requires occasional calibration for accuracy. Speed vs. Torque: Which Should You Choose? Your decision hinges on riding style, budget, and terrain: Speed Sensors suit riders who: Want affordability and simplicity. Ride mostly on flat roads or at consistent speeds. Don’t mind a less nuanced power delivery. Torque Sensors appeal to those who: Value a responsive, "natural" biking feel. Navigate variable terrain (hills, trails, stop-and-go traffic). Are willing to invest in premium performance. The Future of E-Bike Sensing As e-bike technology evolves, some brands are integrating hybrid systems that combine speed and torque data for even smoother rides. Meanwhile, advancements in machine learning could enable sensors to "learn" rider preferences over time. Final Thoughts Whether you prioritize affordability or performance, understanding sensors is key to choosing the right e-bike. Speed sensors offer straightforward assistance, while torque sensors deliver a refined, athletic ride. Test both if possible—your legs (and your commute) will thank you! Ready to upgrade your ride? Share your sensor preferences in the comments! 🚴⚡
Read More
7 Tips to Make Your E-Bike Rides Smoother and More Comfortable
May 15, 2025
Electric bikes (e-bikes) are revolutionizing urban commutes and outdoor adventures, offering speed, efficiency, and eco-friendly fun. But even the best e-bike can feel exhausting or uncomfortable if you’re not set up properly. Whether you’re a daily commuter or a weekend explorer, here are seven practical tips to transform your rides into effortless, enjoyable journeys. 1. Dial In Your Riding Position Your posture is the foundation of comfort. Start by adjusting your seat height: When seated, your leg should be almost fully extended at the pedal’s lowest point (a slight bend in the knee prevents strain). Next, check the handlebar height—higher bars reduce lower back pressure, while lower bars improve aerodynamics for speed. Experiment to find a balance that keeps your shoulders relaxed and wrists neutral. Pro tip: If your e-bike has a suspension seatpost, use it! It absorbs bumps and reduces fatigue on rough terrain. 2. Upgrade Your Seat (Your Butt Will Thank You) Stock e-bike seats often prioritize style over comfort. If you’re riding for more than 30 minutes, invest in a wider, ergonomic saddle with memory foam or gel padding. Look for models with a center cutout to relieve pressure on sensitive areas. For extra cushioning, add a padded seat cover or cycling shorts with built-in chamois. 3. Optimize Tire Pressure Underinflated tires feel sluggish and increase rolling resistance, while overinflated tires make every bump jarring. Check your e-bike’s recommended PSI (usually printed on the tire sidewall) and use a floor pump with a pressure gauge. For mixed terrain, slightly lower the pressure for better grip and shock absorption. Wider tires (2.5”+) also add stability and comfort on uneven surfaces. 4. Master the Power Modes E-bikes aren’t just about “full throttle.” Use pedal-assist modes strategically: Eco/Low Mode: Perfect for flat roads or warm-ups. Mid/High Mode: Tackle hills or headwinds without overexerting. Throttle-Only: Reserve for quick starts at intersections or when you need a break.Balancing these modes conserves battery and keeps your effort steady, preventing muscle burnout. 5. Dress for Success Layers: Wear moisture-wicking base layers to stay dry, and add a windbreaker if needed. Gloves: Padded cycling gloves reduce hand numbness and improve grip. Shoes: Opt for stiff-soled sneakers or cycling shoes for efficient pedaling. Eyewear: Protect your eyes from dust, bugs, and UV rays with wraparound sunglasses. 6. Tame the Terrain with Suspension If your e-bike lacks built-in suspension, consider these add-ons: Suspension Seatpost: Absorbs vibrations from bumps. Front Suspension Fork: Ideal for off-road trails or pothole-ridden streets. Cushioned Grips: Reduce hand fatigue and improve control. 7. Pack Smart, Ride Light Carrying heavy bags on your back can strain your shoulders and spine. Use panniers, a rear rack, or a handlebar basket to distribute weight evenly. Don’t forget essentials like water, a portable pump, and a multitool for quick adjustments. Bonus: Maintenance Matters A well-tuned e-bike is a comfortable e-bike: Lubricate the chain monthly to keep pedaling smooth. Check brake pads for wear—squeaky brakes are a safety hazard. Keep bolts tightened (especially on the seat and handlebars). Final ThoughtsComfort is key to unlocking the full potential of your e-bike. Small tweaks to your setup, gear, and riding habits can turn a bumpy, exhausting ride into a blissful cruise. Remember: E-bikes are meant to enhance your journey, not replace the joy of riding. So, adjust, experiment, and hit the road with confidence! What’s your go-to comfort hack for e-biking? Share in the comments below! 🚴⚡
Read More