A Practical Guide to U.S. Hunting Seasons in the United States (Rules, Timing & Access)
Dec 18, 2025
Hunting season is a cornerstone of outdoor life in the United States, marking the time each year when millions of hunters head into forests, mountains, plains, and public lands. Unlike nationally fixed events, hunting seasons are determined at the state level. Each state — and often each wildlife management unit — sets its own dates based on wildlife populations, migration data, conservation priorities, and the type of hunting equipment allowed.
If you plan to hunt this year, understanding your state’s official season dates and regulations is the foundation of a legal and successful hunt. This guide explains how U.S. hunting seasons work, what hunters must pay close attention to, where to find official state resources, and how modern tools like electric bikes are helping hunters access large areas more efficiently and quietly.
What Does “Hunting Season” Mean in the U.S.?
In the United States, hunting seasons are established by state wildlife agencies to control when specific species may be harvested. The purpose is not only to allow recreational hunting, but also to protect ecosystems and ensure long‑term wildlife sustainability.
Season structures are designed to:
- Prevent hunting during breeding and fawning periods
- Maintain healthy population levels for species such as deer, elk, and turkey
- Reduce overpopulation that can damage habitat or agriculture
- Align harvest opportunities with scientific monitoring and conservation goals
There is no single nationwide hunting season. Dates, legal species, and methods of take vary by state, region, and weapon type. Archery, muzzleloader, and modern firearms seasons are typically scheduled separately, often spanning several months in total.
Essential Regulations Every Hunter Must Understand
Because rules differ widely across states and species, preparation is critical before entering the field. Hunters should always review official regulations for the specific location and game they intend to pursue.
Key points to confirm include:
Licenses and TagsMost states require a general hunting license. Big‑game animals such as deer, elk, or moose also require species‑specific tags, while migratory birds require a federal Duck Stamp.
Weapon‑Specific SeasonsArchery, muzzleloader, and firearm seasons do not overlap in many states. Always verify that your weapon type is legal for the specific dates you plan to hunt.
Hunting Units and ZonesStates often divide land into counties, zones, or wildlife management units. Rules can change from one unit to the next, even within the same state.
Bag LimitsHarvest limits vary by species, sex, and region. Some areas allow a single deer, while others permit multiple tags depending on population goals.
Species IdentificationHunters are responsible for identifying legal game correctly — for example, buck versus doe or tom versus hen — and avoiding protected or out‑of‑season species.
Safety and Access RulesHunter orange requirements, safe shooting distances, road‑hunting restrictions, and public‑land access rules must be followed at all times. When using eBikes or other vehicles, verify that they are permitted in your hunting area.
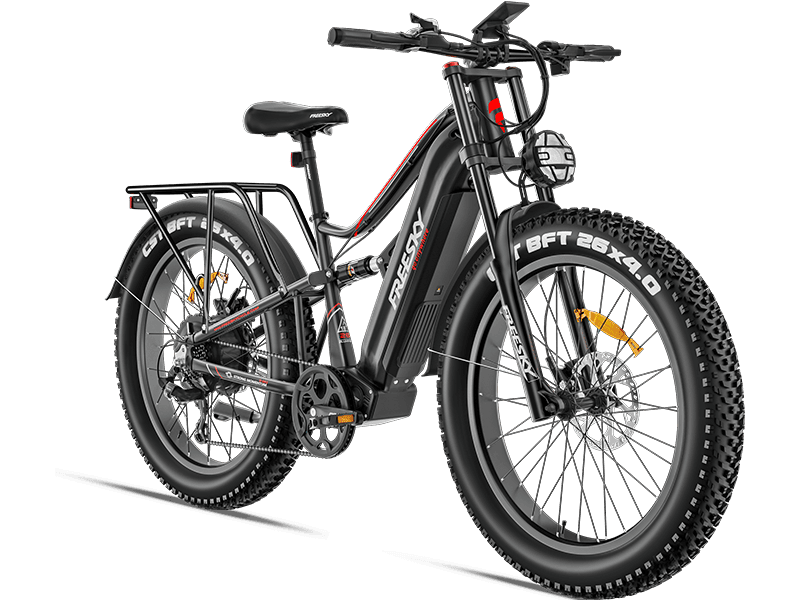
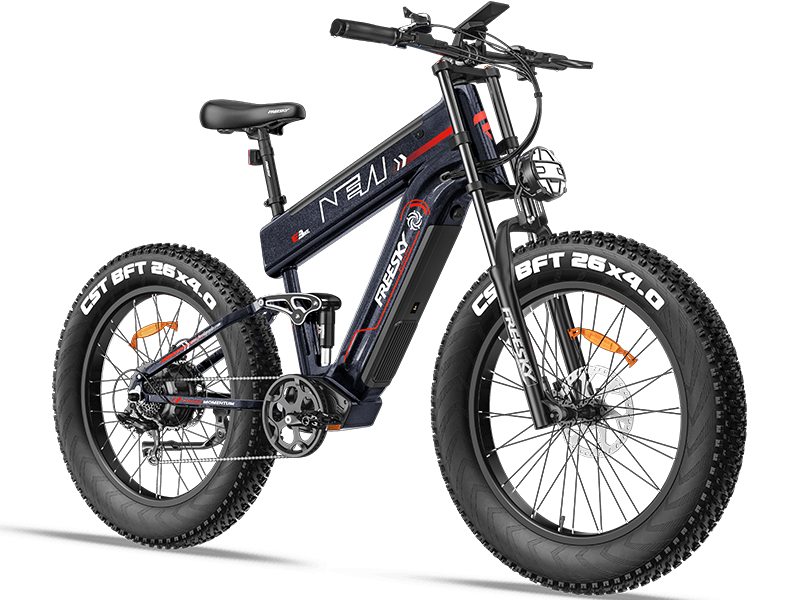
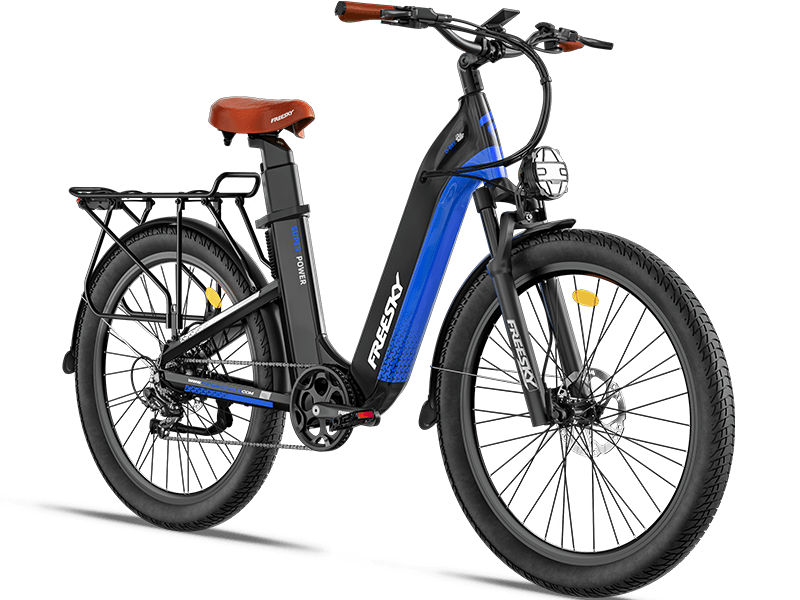
Get the E-Bike Shown Here: Freeskycycle eBike | 2500W Peak BaFang Motor Electric Mountain Bike with Rear Rack | Freesky Swift Horse Pro X-6E
Official U.S. State Hunting Season Resources (2025–2026)
Below is a consolidated reference to official state wildlife agency websites where current season dates, regulations, and updates are published.
Alabama:
Alabama DCNR Hunting
Alaska:
Alaska ADFG Hunting
Arizona:
Arizona Hunting Overview
Arkansas:
Arkansas Hunting Overview
California:
Hunting in California
Colorado:
Colorado Parks & Wildlife Seasons
Connecticut:
CT DEEP Hunting
Delaware:
Delaware DNREC Hunting
Florida:
Florida FWC Seasons
Georgia:
Georgia DNR Hunting
Hawaii:
Hawaii DLNR Hunting
Idaho:
Idaho Fish & Game Seasons
Illinois:
Illinois DNR Hunting
Indiana:
Indiana DNR Seasons
Iowa:
Iowa DNR Hunting
Kansas:
Kansas Wildlife Hunting Seasons
Kentucky:
Kentucky Fish & Wildlife Seasons
Louisiana:
Louisiana LDWF Hunting
Maine:
Maine IF&W Seasons
Maryland:
Maryland DNR Hunting
Massachusetts:
MassWildlife Seasons
Michigan:
Michigan DNR Calendar
Minnesota:
Minnesota DNR Hunting
Mississippi:
Mississippi MDWFP Seasons
Missouri:
Missouri MDC Seasons
Montana:
Montana FWP Regulations
Nebraska:
Nebraska Game & Parks Seasons
Nevada:
Nevada NDOW Hunting
New Hampshire:
NH Fish & Game Seasons
New Jersey:
NJ Fish & Wildlife Seasons
New Mexico:
NM Game & Fish Seasons
New York:
NYSDEC Hunting Seasons
North Carolina:
NC Wildlife Seasons
North Dakota:
ND Game & Fish Seasons
Ohio:
Ohio DNR Hunting
Oklahoma:
Oklahoma Wildlife Seasons
Oregon:
Oregon ODFW Seasons
Pennsylvania:
PA Game Commission Seasons
Rhode Island:
RI DEM Hunting
South Carolina:
SC DNR Seasons
South Dakota:
SD GFP Seasons
Tennessee:
TWRA Seasons
Texas:
Texas TPWD Seasons
Utah:
Utah DWR Seasons
Vermont:
Vermont F&W Seasons
Virginia:
Virginia DGIF Seasons
Washington:
Washington WDFW Seasons
West Virginia:
WV DNR Seasons
Wisconsin:
Wisconsin DNR Seasons
Wyoming:
Wyoming Game & Fish Seasons
Mobility in Hunting Season: Why eBikes Are Gaining Popularity
Once regulations and season dates are clear, the next challenge is access. Modern hunting often means covering large tracts of public land, scouting multiple locations, and moving equipment efficiently without disturbing wildlife.
Electric bikes have emerged as a practical solution for hunters because they provide:
- Quiet movement compared with trucks or ATVs
- Extended range for scouting and multi‑day planning
- Cargo capacity for gear and harvested game
- Access to roads and trails where motor vehicles may be restricted
When chosen correctly, an eBike becomes a functional tool that complements legal hunting practices rather than replacing traditional skills.
Get the E-Bike Shown Here: Freeskycycle eBike | Dual Motor, Peak Power 4000W Electric Mountain Bike | Freesky Electric Bike Warrior Pro M-530
FREESKY Ranger – High-Power Dual Motor eBike for Hunting Access
The FREESKY Ranger is built for hunters who need strong acceleration, steep-climb capability, and long-range access across demanding terrain. With a dual-motor system and unlocked controller, it delivers the power required to reach remote hunting areas efficiently while carrying full gear loads.
Why it works for hunting season:
- Peak 3500W dual motor system (200Nm torque): Easily climbs steep grades up to 40°, ideal for hills, forest roads, and off-road access routes
- 48V 25Ah removable battery: Delivers approximately 60–95 miles per charge, supporting full-day scouting and long entry routes
- 26×4.0" fat tires: Enhanced traction on mud, snow, sand, and uneven terrain
- 4-piston hydraulic disc brakes: Reliable stopping power for high-speed travel, long descents, and wet or icy conditions
- HD color display with NFC system: Quick startup and clear visibility of speed, range, and riding mode
- Multiple riding modes: Throttle, pedal assist, cruise control, and walk assist adapt to different hunting and access scenarios
For hunters who value speed, power, and flexibility when accessing large public lands, the Ranger is a highly capable hunting-season mobility tool.
Shop FREESKY Ranger: Freeskycycle eBike | Dual Motor, Peak Power 3500W & Step-thru Electric Bike | Freesky Electric Bike Ranger M-540
FREESKY Warrior Pro – Full-Suspension Dual Motor eBike for Extreme Terrain Hunting
The FREESKY Warrior Pro is designed for hunters operating in the most demanding environments—mountainous terrain, deep public land, and long backcountry routes. Its full-suspension platform and ultra-high-power dual motors provide maximum control, comfort, and load capacity.
Hunting-ready advantages:
- Peak 4000W dual motor system (up to 40 mph unlocked): Exceptional torque and climbing power for steep access roads and heavy cargo
- 48V 30Ah Samsung battery (UL 2271 certified): Approximately 50–120 miles of range depending on terrain and assist level
- Full suspension setup: Adjustable front fork and rear shock reduce fatigue during long rides over rough ground
- 26×4.0" fat tires: Stable handling on snow, sand, forest roads, and rocky trails
- Advanced lighting system: Integrated headlight, brake light, and turn signals improve safety during low-light travel
- UL 2849 system certification: TÜV-verified safety and reliability for the entire eBike system
For hunters who regularly carry heavy equipment and travel far beyond vehicle access points, the Warrior Pro offers maximum confidence and capability throughout the hunting season.
Shop FREESKY Warrior Pro: Freeskycycle eBike | Dual Motor, Peak Power 4000W Electric Mountain Bike | Freesky Electric Bike Warrior Pro M-530
Conclusion
Hunting seasons in the United States are carefully structured to balance opportunity with conservation. Because every state operates under its own rules, verifying official season dates and regulations before each hunt is essential.
As access challenges increase and hunting areas expand, mobility tools like eBikes are becoming a practical addition to modern hunting strategies. Quiet operation, extended range, and cargo capability allow hunters to scout more effectively and move responsibly through public land.
By combining regulatory awareness, ethical practices, and appropriate equipment, hunters can prepare confidently for the upcoming season — wherever the next hunt leads.
Q1: Is hunting season the same in every U.S. state?No. Each state sets its own season dates, species rules, and weapon-specific timelines based on local wildlife management data.
Q2: Are electric bikes legal to use during hunting season?Regulations vary by state and by land management agency. Hunters must verify whether eBikes are permitted on public lands, trails, or access roads.
Q3: Why do hunting seasons differ by weapon type?Separating archery, muzzleloader, and firearm seasons helps manage harvest pressure and improves safety while extending overall hunting opportunity.
Q4: What features matter most in an eBike for hunting?Key factors include torque, range, load capacity, quiet operation, and tire performance on soft or uneven terrain.
Read More
Winter E-Bike Maintenance Guide: How to Keep Your Electric Bike Performing in Cold Weather
Dec 15, 2025
Winter doesn’t have to put an end to your riding season—especially if you’re riding a well-built, weather-resistant electric bike. That said, colder temperatures, road salt, moisture, and shorter daylight hours introduce challenges that riders don’t typically face during spring or summer. Battery performance changes, braking efficiency can decrease, traction becomes less predictable, and drivetrain wear tends to accelerate in winter conditions.
Whether you ride through winter as part of your daily commute or only take your e-bike out occasionally during the colder months, proper maintenance plays a critical role in protecting your investment and ensuring every ride remains safe, efficient, and comfortable.
This guide covers everything you need to know about winter e-bike maintenance, drawing on real-world riding experience, fundamental engineering principles, and widely accepted industry best practices—including considerations relevant to modern, IPX-rated and UL-certified electric bikes.
Why Winter E-Bike Maintenance Matters
Cold-weather riding changes how your electric bike behaves in predictable ways:
- Lithium-ion batteries deliver less range in low temperatures
- Wet, icy, or snowy roads reduce traction
- Road salt accelerates corrosion on metal components
- Moisture affects braking and drivetrain performance
- Tire pressure drops more quickly as temperatures fall
- Metal components contract slightly, impacting long-term alignment
- Charging safety becomes more critical when batteries are cold
Ignoring these factors does more than reduce ride quality—it accelerates wear and shortens the lifespan of key components. Winter maintenance is primarily about prevention, not repair.
1. Battery Protection: The Most Critical Winter Priority
Lithium-ion batteries are highly temperature-sensitive. As temperatures drop, chemical reactions inside the cells slow down, resulting in:
- Reduced riding range
- Weaker power delivery and acceleration
- Faster perceived battery drain in higher assist modes
Cold temperatures alone rarely cause permanent damage to a healthy battery. However, charging a battery while it is cold can significantly reduce its long-term capacity.
Winter Battery Care Best Practices
- Bring the battery indoors when temperatures drop below 40°F (4°C)
- Never charge a battery that feels cold—allow it to warm to room temperature first
- Expect 20–40% range reduction during winter riding
- Avoid long-term outdoor storage or unheated garages
- After riding, wait 30–60 minutes before charging
- For extended storage, maintain the battery at 50–70% charge
With proper care, an e-bike battery can last 3–5 years. Poor winter charging habits can cut that lifespan nearly in half.
Get the E-Bike Shown Here: Freeskycycle eBike | Dual Motor, Peak Power 4000W Electric Mountain Bike | Freesky Electric Bike Warrior Pro M-530
2. Maintain Proper Tire Pressure for Winter Conditions
Tire pressure decreases approximately 1 PSI for every 10°F drop in temperature. In winter, this happens quickly and consistently.
Why Tire Pressure Matters More in Winter
- Underinflated tires increase rolling resistance, reduce range, and raise the risk of pinch flats
- Overinflated tires reduce contact with the ground and compromise grip on wet or icy surfaces
Winter Tire Recommendations
- Check tire pressure at least once per week
- In snow or slush, run tires toward the lower end of the recommended PSI range for better traction
- For frequent winter riding, consider:
1) Studded tires for icy roads
2) Fat tires for snow and mixed terrain
3) Tires with aggressive winter tread patterns
Small pressure adjustments can significantly improve winter stability and control.
3. Clean Your E-Bike More Frequently to Combat Road Salt
In much of North America, winter roads are treated with salt and chemical de-icers. These substances are extremely corrosive to bicycle components if not removed promptly.
Road salt accelerates corrosion on:
- Chains and cassettes
- Bolts and fasteners
- Brake calipers and rotors
- Spokes and nipples
- Exposed metal areas around the motor and frame
Simple Winter Cleaning Routine
After riding on salted or slushy roads:
- Wipe down the frame, fork, and wheels with a damp cloth
- Clean the chain and drivetrain if salt or grime is visible
- Dry the bike thoroughly to prevent moisture buildup
- Apply a bike-safe anti-corrosion spray to bolts and exposed metal (avoid brake surfaces)
- Do not use pressure washers—high-pressure water can force moisture into bearings and electrical components
Water resistance helps with rain and snow, but only regular cleaning prevents corrosion.
Get the E-Bike Shown Here: Freeskycycle eBike | Electric Step Thru Bike Wild Cat Ultra A-340 | Freesky Electric Bike
4. Increase Chain and Drivetrain Maintenance Frequency
Winter riding conditions create a highly abrasive mix of water, salt, and fine grit that rapidly wears drivetrain components.
Winter Drivetrain Care Tips
- Clean and lubricate the chain every 50–80 miles, or whenever it appears dry or dirty
- Use a wet-condition chain lubricant designed for rain and snow
- Wipe off excess lubricant to prevent dirt accumulation
- Inspect the chain for rust and stretch regularly
- Daily winter commuters should treat drivetrain inspection as a weekly task
A clean drivetrain improves efficiency, reduces motor strain, and extends component life.
5. Pay Extra Attention to Your Brakes
Braking performance is even more critical in winter. Reduced traction and wet surfaces increase stopping distances if brakes are not properly maintained.
Winter Brake Maintenance Guidelines
- Inspect brake pads regularly and replace them when worn or glazed
- Listen for squealing, scraping, or grinding noises
- Clean brake rotors with isopropyl alcohol to remove salt residue
- If hydraulic brakes feel soft or inconsistent, consider a bleed service
- Test brakes at low speed before every ride
Reliable brakes are essential for winter safety.
Get the E-Bike Shown Here: Freeskycycle eBike | Dual Motor, Peak Power 3500W & Step-thru Electric Bike | Freesky Electric Bike Ranger M-540
6. Inspect and Protect Electrical Components
Modern e-bikes are designed for wet conditions, but winter moisture and condensation require extra attention.
Electrical Care Best Practices
- Wipe snow and water off displays and controls after riding
- Ensure battery contacts are dry before installation or removal
- Keep all ports sealed during rides
- Allow snow-covered bikes to thaw indoors before powering on
- Avoid deep slush or standing water that could reach the motor hub
Good habits add an extra layer of protection for electronic systems.
7. Lubricate Moving Parts to Prevent Cold-Weather Stiffness
Cold temperatures amplify friction in under-lubricated components.
Key Areas to Lubricate
- Brake and shifter lever pivots
- Derailleur pivot points
- Kickstand pivot
- Seatpost (lightly, if not carbon)
- Pedal threads and interfaces
Use minimal lubricant and remove excess to prevent dirt buildup.
8. Store Your E-Bike Correctly During Winter
Proper storage plays a major role in long-term reliability.
Winter Storage Checklist
- Store the bike indoors in a dry location whenever possible
- Ideal storage temperature: 50–70°F (10–21°C)
- Maintain battery charge at 50–70% during extended downtime
- Keep tires inflated to normal PSI
- Clean the bike before long-term storage
- If outdoor storage is unavoidable, use a breathable, waterproof cover
Correct storage minimizes corrosion and preserves battery health.
Get the E-Bike Shown Here: Freeskycycle eBike | 2000W Peak Motor Electric Mountain Bike Eurostar Ultra M-410 | Freesky Electric Bike
9. Optional Upgrades for Safer Winter Riding
Certain upgrades significantly improve winter visibility and comfort:
- Brighter front lights (400–800 lumens)
- Rear lights with brake-sensing or steady-on modes
- Full-coverage fenders
- Waterproof gloves or handlebar mitts
- Reflective decals on frame or wheels
- Waterproof panniers or commuting bags
While optional, these upgrades make winter riding more practical.
10. Perform a Quick Pre-Ride Check Every Time
Winter riding demands consistency.
2-Minute Winter Pre-Ride Checklist
- Is the battery charged and at room temperature?
- Are tires inflated appropriately for current conditions?
- Do both brakes engage firmly?
- Are all lights functioning?
- Is there ice or packed snow near wheels or drivetrain?
- Does the chain appear clean and lubricated?
This quick routine helps prevent minor issues from becoming major problems.
Final Thoughts: Smart Winter Maintenance Extends Your E-Bike’s Life
Winter does not have to limit your riding. With proper care, an electric bike can remain dependable through cold, wet, and even snowy conditions.
Focus on the fundamentals:
- Protect and charge the battery correctly
- Maintain proper tire pressure and traction
- Remove road salt promptly
- Lubricate the drivetrain and moving parts more frequently
- Inspect brakes, lights, and electrical connections regularly
- Store the bike in a dry, temperature-stable environment
Consistent winter maintenance pays dividends in longevity, safety, and performance—ensuring your e-bike is ready to ride, no matter how low the temperature drops.
Read More
Our First E-Bike Adventure: Riding Through the Forest to Waskesiu Lake
Dec 12, 2025
A Scenic Ride Through Forest Trails and Lakeside Views
My wife and I set off on an e-bike ride to Waskesiu Lake, marking our first cycling adventure through forest trails and along the water. It was also our first time truly exploring nature together on e-bikes—a ride that turned out to be far more memorable than we expected.
Perfect Weather for an E-Bike Ride
The conditions could not have been better. Clear blue skies stretched above us, the air was fresh and cool, and sunlight filtered gently through the trees. Thanks to the electric assist, the ride felt smooth and relaxed, allowing us to focus less on effort and more on the experience around us.
Riding Through the Forest
As we followed the trail, we were surrounded by tall, lush pine trees. The forest felt alive—squirrels darted across the path, birds moved between branches, and the scent of pine filled the air. The e-bikes handled the forest terrain with ease, making the ride comfortable and steady even on longer stretches.
We chatted as we rode, enjoying the quiet rhythm of the trail and the feeling of being fully immersed in nature.
Reaching the Lake
The highlight of the ride came when we arrived at Waskesiu Lake. The water was a striking shade of blue, calm and reflective like a mirror. The surrounding landscape was perfectly reflected on the surface, creating a peaceful, almost surreal scene.
We stopped at the lakeside to take photos and simply take it all in. A few ducks glided slowly across the water, adding to the calm and unhurried atmosphere.
More Than Just a Ride
This journey was more than a simple e-bike trip. It was a shared experience—our first forest and lakeside ride together, made easier and more enjoyable by electric assist. The e-bike allowed us to ride farther, stay comfortable, and truly appreciate the scenery without feeling rushed or exhausted.
For us, this ride to Waskesiu Lake was the beginning of many more outdoor adventures to come.
Read More


